It took about few weeks for to understand (hard way) the application of Interrupt in Ethernet Shield. There is no complete explanation or manual in the internet could be found. Anybody (including me) who were trying to search how to write the arduino sketch and make interrupt works will find a partial explanation in forum.
As I discovered the way how to make interrupt work in Ethenet Sheild, I think people out there maybe has the same difficulty like me. So, I try my best to explain it all (hopefully) and make everybody understand.

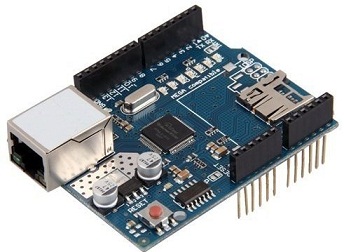
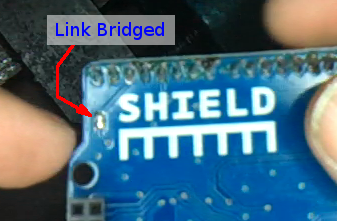
First of all, we need to do something at Ethernet Shield. I am using W5100 Ethernet Shield. At many kind of these board, there is a copper disconnection on the board labelled as INT. This disconnection needs to be shorted (soldered) or link briged. In hardware term, this circuit will connected to Digital Pin 2 on Arduino. This is to allow Arduino to check interrupt from Ethernet Shield.

There are many kind of W5100 Ethernet Shield and all look different but the function is still the same. Therefore, the INT circuit, maybe located on or underneath the board.
Then, we need to do some setting to enable Ethernet Shield IMR (Interrupt Mask Register). By default, IMR is not enable.
In sketch, please write down the library for W5100.
#include <SPI.h>
#include <Ethernet.h>
#include <utility/w5100.h> //Important if you want to use interrupt. Normally, not use in ethernet example. Only Ethernet.h and SPI.h.
In setup subroutine (void setup()), write down below line. This line is to enable IMR in Ethernet Shield. Please understand the remarks for each line.
// get default IMR
byte oldIMR = W5100.readIMR();
Serial.print("Old IMR = ");
Serial.println(oldIMR,HEX);
// enable interrupts for all sockets
W5100.writeIMR(0x0F);
// read again to insure it worked
byte newIMR = W5100.readIMR();
Serial.print("New IMR = ");
Serial.println(newIMR,HEX);
And also, in setup subroutine, write down the interrupt function.
attachInterrupt(0,ISR_function, MODE).
Where 0 - Interrupt number 0, located at Digital Pin 2 (remember we shorted the INT circuit?). For Arduino Uno, also got Interrupt number 1, which located at Digital Pin 3.
ISR_function - function or subroutine we write for Arduino to do when interrupt is drawn to it. Sometimes, called Interrupt Service Routine.
MODE -
- LOW to trigger the interrupt whenever the pin is low,
- CHANGE to trigger the interrupt whenever the pin changes value
- RISING to trigger when the pin goes from low to high,
- FALLING for when the pin goes from high to low.
Finally, write the ISR function. Example, void ISR_function() { ..................... }
There are some rules to write sketch in IMR function. ISR - Interrupt Service Routine.
1. This function takes no parameter and return nothing. Therefore, do not let Arduino read some input from it's IO and return some value.
2. Some people do this mistake. Do not write function Serial.print() or Serial.println(). These functions require interrupt also. Therefore, if you use these function in ISR function, Arduino will hang.
3. Make the function simple without doing both mistakes.
